How to Use the Duplicate Content Checker
URL Profiler’s duplicate content checker takes a snippet of text from the URLs you import, then searches it in Google to try and find duplicate matches. This is much like a manual check you will undoubtedly have carried out previously, except it does it in bulk.
It works very, very well.
However, in order for you to get the best results it is important you set up the tool correctly. This post will explain the various setup options, and how to use them to get incredibly insightful duplicate content results.
Note: This feature requires the use of proxies. There is more information on this below but the long and short of it is that you need to use proxies with this feature. If you are too much of a pussy to use proxies, you might as well walk away now.
Getting Started
As with all processes on URL Profiler, you start by importing your URLs and selecting the right tickbox options.
In this instance, the data we are interested in is on a ‘per URL’ basis, therefore the ‘Duplicate Content’ option we need is under ‘URL Level Data.’
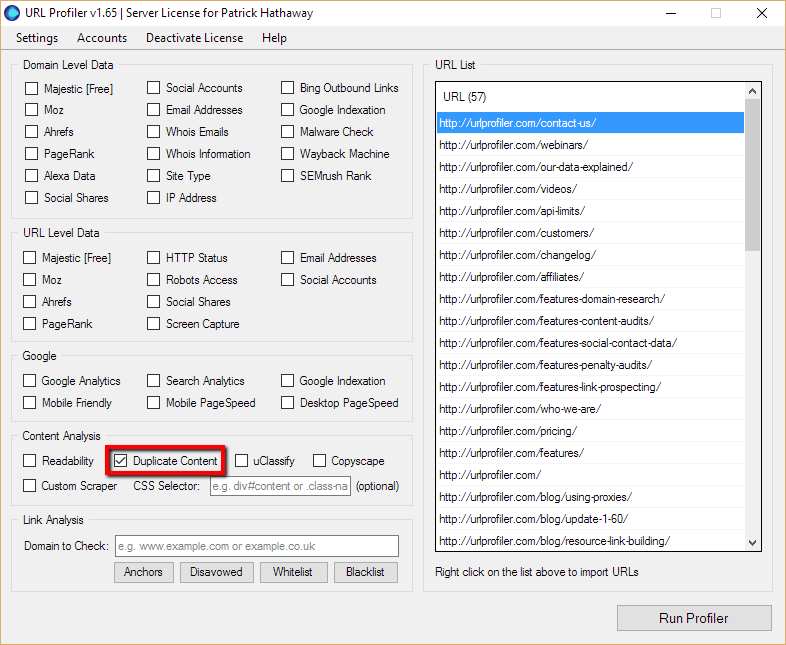
When you tick this box, you will be presented with a new page of settings options.
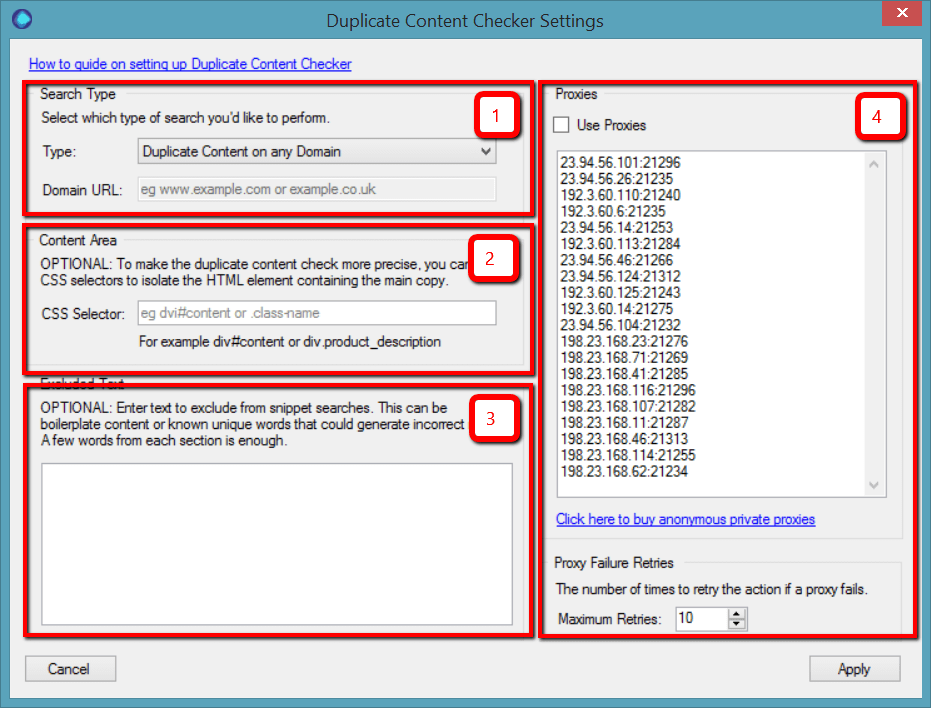
Here’s what we’re looking at:
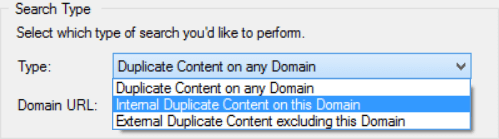
- Search Type – this setting allows you to choose if you wish to find internal duplicate content, external duplicate content, or just any indexed duplicate content (on any domain).
- Content Area – this allows you do add a div tag which defines the main content area via CSS
- Excluded Text – this allows you to add some known phrases that you know are present on the pages, but don’t want the tool to class as duplicate
- Proxies – this allows you to add proxies and determine the proxy retry rate
Whilst all 4 of these are optional, we highly recommend that you set up the content area (2) and use proxies (4) – otherwise you will probably get shit results (don’t blame us!)
I’ll run through each in turn.
1. Search Type
When you run the duplicate content check feature, the tool will literally go and grab some text snippets from your page, then search them in Google with quote marks.
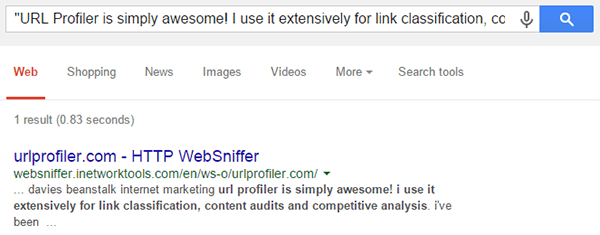
If you did this manually for our homepage, you might search something like this:
“URL Profiler is simply awesome! I use it extensively for link classification, content audits and competitive analysis”
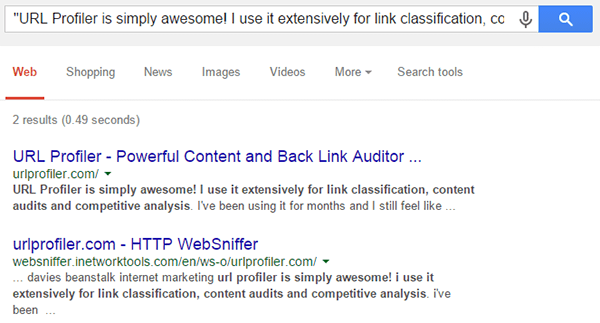
This result is equivalent to the default option in ‘Search Type’, which is Duplicate Content on any Domain. We just search using text from the page, and any domains could be included in the results.
In this case the result in the export would be 2 (we also give you the Google URL of the query used). However, without manually confirming, there is no way to tell if that is 2 different websites, or 2 results both from the urlprofiler.com domain.
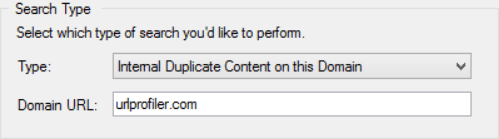
To get a clearer picture, you can use one of the other options from the dropdown, such as Internal Duplicate Content on this Domain
In order for this to work, you must enter a domain or subdomain in the box underneath.
This works by adjusting the query using a site: search:
“URL Profiler is simply awesome! I use it extensively for link classification, content audits and competitive analysis” site:urlprofiler.com
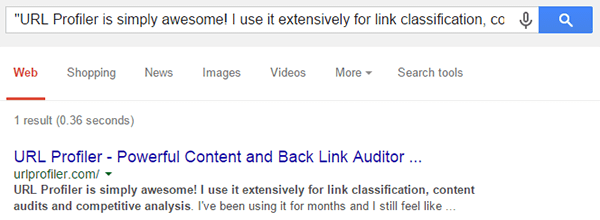
As expected, this returns just one result, indicating that there is no internal duplicate content for that URL.
If you instead select External Duplicate Content on this Domain from the dropdown, this will adjust the query to exclude the domain you specify.
“URL Profiler is simply awesome! I use it extensively for link classification, content audits and competitive analysis” -site:urlprofiler.com
Which again gives us 1 result, indicating there is at least 1 other site with duplicate content from our homepage.
In practice, we have found it most useful to search all domains initially on a range of URLs to try and spot some patterns, then drilling down to specific page types and searching those for internal or external duplicate content.
2. Content Area
On every webpage there is duplicate content all over the place. Headers, footers, sidebars, navigation areas – all contribute to duplicate content. However, if Google penalised us for stuff like that, every website on the planet would get penalised.
Instead, Google try to extract the ‘real’ content area and make a judgement on that. URL Profiler does a similar thing, through a process known as ‘dechroming’; it strips away the template areas in order to identify the proper textual content – and then takes text snippets from there.
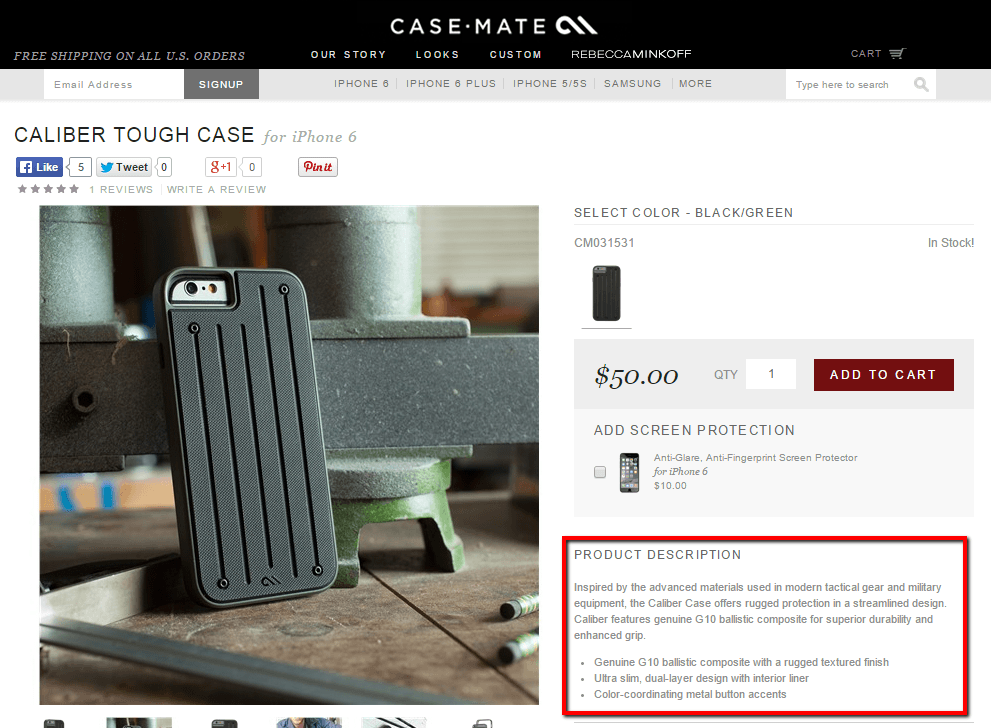
Typically, it’s these sorts of description areas that we are interested in.
However, this automatic detection process is far from perfect, which, coupled with inconsistencies in HTML markup, can lead to inaccurate results.
So, instead of having URL Profiler guess where the content area is, we recommend that you just tell it where to look instead.
CSS Selectors
You can do this using CSS selectors. Don’t worry, you don’t need to be a developer to understand how these work. In basic terms, CSS selectors are patterns used to determine which elements of the HTML you wish to style.
So you can create a CSS rule to say ‘take all elements that look like X (in the code) and make them bold‘.
This could be, ‘take all elements that look like the product description and make them bold.’ And we determine what classes as the product description by using its CSS selector.
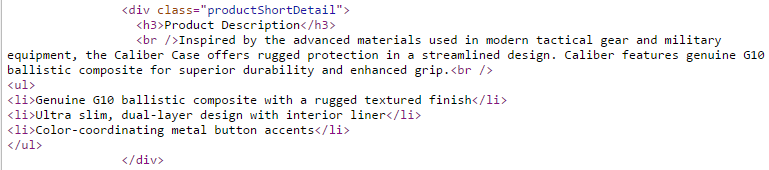
In the example above, we can search the source code to find the description area, and can see it is identified by the div class ‘productShortDetail.’
Using Chrome’s DevTools, we can see the CSS rules associated with this div.
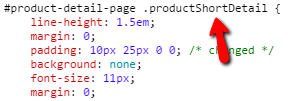 For our use, the CSS rules themselves don’t matter to us, we just need to know the div, which we enter into the ‘Content Area’ box of the duplicate content settings:

As you can see, this is specified as div.productShortDetail in the box.
Inspect Element
A quicker way to identify the div you need is to use Chrome’s ‘Inspect Element’ feature. Highlight a bit of text in the content area you are interested in, then right click to shortcut to the DevTools interface.
Then, try to locate the text are in the ‘Elements’ section at the bottom. As you hover over different elements you will see blocks highlighted on the webpage above. You will see your content area highlighted when you have found the right one.
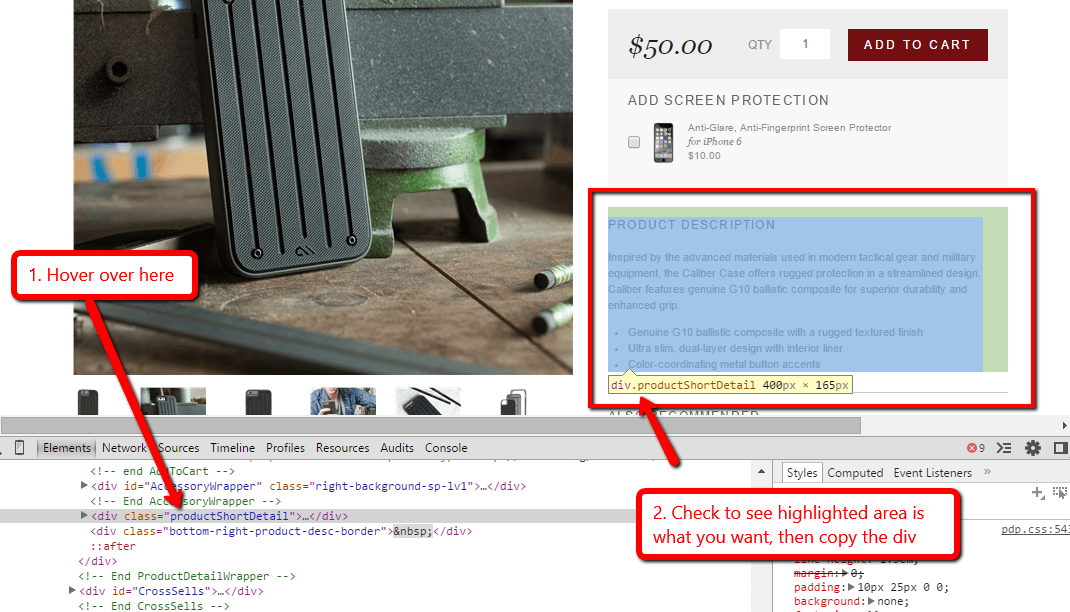
Then you just need to look in the little yellow bubble (in the above example this is ‘div.productShortDetail 400px x 165px’), which is where you get the div.productShortDetail bit to put into URL Profiler.
If you are not familiar with the process, just experiment with a couple of URLs and check the right sort of queries are coming out.
Caveats
Using this method definitely makes your results more accurate. We always recommend doing it.
However there are a couple of important caveats:
- It normally only works on URLs of the same page type. Product pages will use a different template to category pages, and likely use different divs to specify content areas. So break your URLs up into page type and profile them separately (with different CSS selectors for each).
- Make sure that the CSS selector you choose is unique – if the website developer has decided to use the exact same div to style another element on the page, you may get inaccurate results. If this is the case, try to identify the ‘parent’ div tag and use that instead.
- It is not bullet proof. If a page is made of malformed HTML (e.g. there is no closing div tag) then it makes it incredibly difficult to parse the HTML properly and extract the text. Even if you have selected the content area, HTML errors can stop the tool from working properly.
3. Excluded Text
The content area section outlined above is the best way of telling URL Profiler which section of the page to look at, however, another way to do this is to use the ‘Excluded Text’ option.
This is a lot more straightforward to explain: ‘If you are aware of certain strings of text on a lot of your pages, and don’t want this to be considered, simply copy the phrase into the box.’
For example, Carphone Warehouse have a little section on stock levels, using a lot of stock phrases (geddit?!) which are repeated on many other pages:
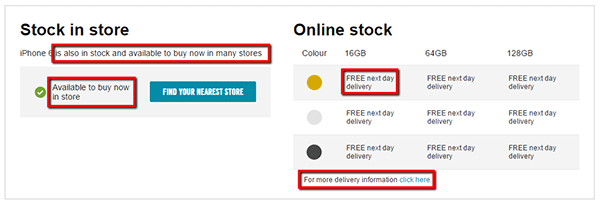 If you were profiling all the product pages for Carphone Warehouse, it is unlikely you would want this text to be considered during the duplicate checks. You can tell the tool to ignore this text by adding it into the ‘Excluded Text’ area, one snippet per line.
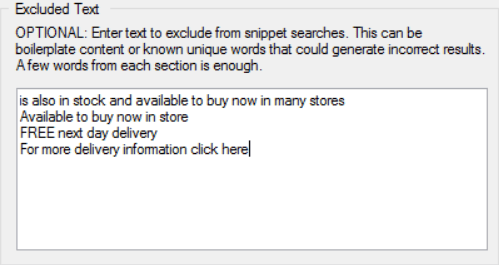
When the checker runs, it will not select text from these areas.
4. Proxies
You need to use proxies with the duplicate content checker.
Well, the tool will run without them, but if you try to profile any more than a handful of URLs Google will block your IP and you’ll be typing in CAPTCHAs for the rest of the day.
Note that this is a white hat use of proxies, so there’s nothing to be ashamed of. It does also mean an additional expense on top of your bargainous URL Profiler license fee. But take a look at Copyscape’s pricing and you’ll see that it’s laughably cheap in comparison (more on prices below).
Either way, if you are afraid or unwilling to use proxies, you might as well stop now – you need to use them.
Why We Need Proxies
The duplicate content checker works by querying Google and scraping the results. In bulk.
URL Profiler uses proxies to help make this behaviour look natural, by spreading the requests out across a number of machines and adding small random delays after each request.
Recommended Proxies
We recommend a provider called BuyProxies.org, and we suggest you use their Dedicated Proxies. We have written a full, detailed guide which explains exactly how to use proxies with URL Profiler and how to get set up with BuyProxies.org.
We recommend you go for their Dedicated Proxies, which are fully anonymous and Google safe – ‘Dedicated’ means that you will be the only person using the proxies, they won’t get burnt out by another user hammering them.
Proxy Format
Private proxies can be secured via IP address or username and password. The required proxy format is simply:
IP:PORT:USERNAME:PASSWORD
Enter each one on a new line in the box provided.
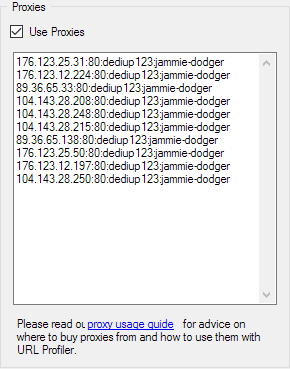
To use private proxies with IP authentication, use the following format:
IP:PORT (e.g. 123.212.12.124:8008)
You can read more about proxy authentication in our Knowledge Base.
More Proxies = Faster Results (Sort of)
If speed is your priority, more proxies will get the job done faster for you. We recommend using between 10 and 100 private proxies.
Here are some rough speed guides:
- 10 proxies will run through 100 URLs in around 5 minutes, and 500 in around 15 minutes
- 50 proxies will run through 100 URLs in around 3 minutes, and 500 in around 8 minutes
- 100 proxies will run through 100 URLs in around 1 minute, and 500 in around 5 minutes
These are not hard and fast rules, as they also depend upon the speed of your server and the speed of your proxies. If you start to see results slow down dramatically, you might need to check your proxies are still working ok.
Note: In addition to scraping Google, we are also scraping your website, so we do throttle the connections to ensure we do not overload your webserver. As such you will see very little difference between using, say, 10 proxies and 20 proxies. This also over-rides any manual connections settings.
Interpreting Results
Everything above tells you how to set the tool up to give you the best results. I will briefly run over how the results should be interpreted, although hopefully a lot of this is self explanatory.
The part of the export which relates to duplicate content looks like this:

There are actually 9 more columns of URLs at the end of this, but I have cropped these for clarity. I will run through each column below:
- Word Count – the, erm… word count. If you do specify a content area, this word count will only take into account said content area.
- Duplicate Content Count – this is the number of results Google displays when we search for the snippet
- Duplicate Content Snippet 1 – we actually search for 2 snippets in combination, this is the first
- Duplicate Content Snippet 2 – and this is the second
- Duplicate Content Results – a link to the specific Google query we used to get the results
- Duplicate Content URL 1 – the first URL Google displays given the search above
- Duplicate Content URLs 2-10 (not displayed above) – the next 9 URLs from the SERP, should they exist
In essence, what you are looking for is a ‘Duplicate Content Count’ equal to 1. This implies that the content on the page is unique, as the snippets searched in Google only provide one result. If you chose to exclude your own domain, you’d be looking for this figure to be 0.
The snippets should help you debug the results to make sure you aren’t getting false positives, and the returned URLs on the right should help give a visual clue to the accuracy of the results.
As above, we recommend doing a little bit of experimentation each time you run this on a new site, to make sure you have picked the right CSS selector and/or the results you are getting will be useful. The ‘Results’ link will allow you to quickly spot check or verify your results.
Thin Content
In some cases, there is simply not enough content for us to grab snippets from, in which case we can’t perform the checks and simply return ‘Thin Content’.

As you can see, the word count supports this – 9 words is not enough for us to grab snippets and test uniqueness. Regardless, if there is only 9 words on a page it is very likely to also be considered thin content by Google as well, so it is already problematic.
Please note that ‘thin content’ refers to textual content only.
Connection Failed
If any of the cells show ‘Connection Failed’, this means your proxies have failed to complete the task. This could mean that you’ve hammered them too hard and Google has banned them (URL Profiler has in-built delays to try and avoid this, however we cannot comment on other software the proxies may have been used on), or that the connections have timed out and the proxies need to be rebooted.
If you just get a few URLs that fail from connections, the easiest thing to do normally is just re-run them. You can test your proxies using Scrapebox, or get in touch with your proxy provider and ask them to reboot the proxies.
TL;DR
I appreciate this is a very long ‘guide’ post, so well done for getting this far. I have tried to explain the ‘why’ as well as the ‘how.’
Summary version is a lot snappier:
- Use the internal/external options to get more specific insight
- Always try to use the content area selector
- Failing that, add in some excluded phrases
- Always use at least 10 private, anonymous proxies
And if you want to read yet more on the duplicate content checker, see the accompanying blog post here.
As ever, just email us on support@ if you have any questions about the duplicate content checker (or indeed anything at all!).

By Patrick Hathaway
I seem to be the one that writes all the blog posts, so I am going to unofficially name myself 'Editor'. In fact, I think I prefer Editor-in-chief. You can follow me on Twitter or 'encircle me' on Google+.
If You Like the Sound of URL Profiler,
Download a Free Trial Today
(You'll be amazed by how much time it saves you, every day!)
- Free 14 day trial (full feature)
- No credit card required
- License from only £12.95 a month