Introducing the Custom Web Scraper

The custom scraper is URL Profiler’s web scraping tool, which allows you to quickly extract data from thousands of URLs. Unlike many of the other solutions available, you can extract information from all the rendered source, including anything not rendered in the browser.
Some stuff you can scrape:
- Text
- URLs
- Tracking codes
- HTML
- Structured Markup
- Inline JavaScript and CSS
- And more
The scraper extracts data from each of the URLs in your list. It can be configured to scrape up to 10 different data values, using a mixture of Regex patterns, XPath or CSS/jQuery selectors. The data is then neatly returned in your results spreadsheet. This function offers an array of different possibilities from scraping user information to collecting data for forensic audits.
How it works
The custom scraper function can be turned on by clicking on the Custom Scraper option within the Content Analysis section.

This will open the configuration window, where you configure the data you want to scrape. Each data selector is configured using the four options.
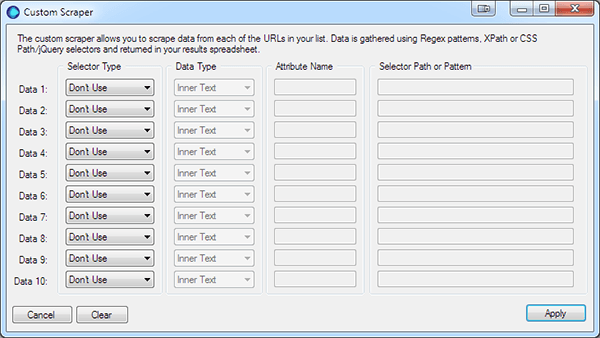
1. Selector Type
There are three selector types:
- CSS Selector, also uses the jQuery selector patterns
- XPath, uses the XPath 1.0 syntax
- Regex, slow and for advanced use only.
TIP: The CSS/jQuery selector is the most efficient way to scrape data. It is quicker and less memory intensive than XPath and Regex.
2. Data Type
The data type tells URL Profiler, which data you want returned:
- Inner Text – the text within the selected element
- Inner HTML – the HTML within the selected element
- Attribute – the attribute value of within the selected HTML element
3. Attribute Name
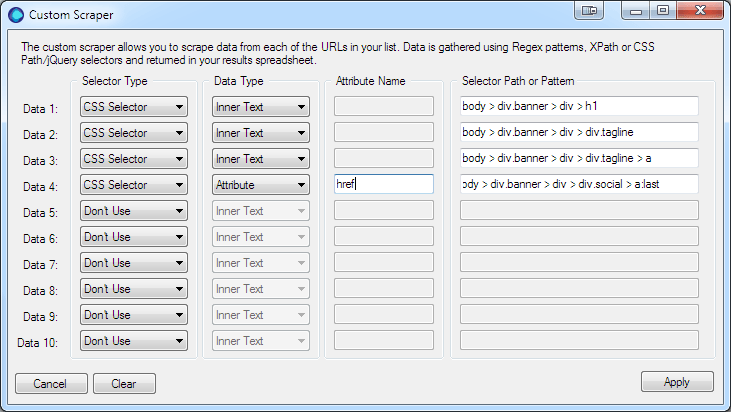
The Attribute Name is only available if you have selected the Attribute data type. For example if you want the URL from an anchor tag you would enter href.
4. Selector
This is where you enter the: CSS Selector, XPath Selector or Regex Pattern depending on which selector type you choose.
TIP: The CSS Selector Type will also work with jQuery selectors.
Note: This is first version of data scraper; currently it does not scrape content generated by JavaScript or Ajax.
A Working Example
The Custom Scraper in URL Profiler makes a great alternative as it can process and scrape the data a lot faster than Excel and works on Apple’s OSX!
In the example I’m going to show you how to scrape user information from the Inbound.org community. I’m not going to cover how to scrape the user’s URLs, but if you’d like to follow along you can download this CSV to import.
I’m also not advocating your scrape Inbound, that would be rude 😉

You’re going to collect:
- User’s Name
- Job title
- Place of work
- User’s website URL
- Social network links
- Karma score
- Share count
- Number of followers
- Number users being followed
To complete this task you’ll need Google Chrome or know a little about CSS or jQuery Selectors. I’m sure you can do this with Firefox, but I’d rather use a superior browser!
1. Open URL Profiler and Import or paste in your URLs
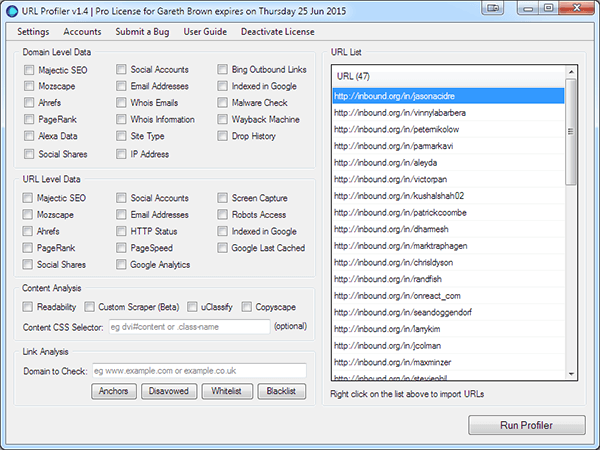
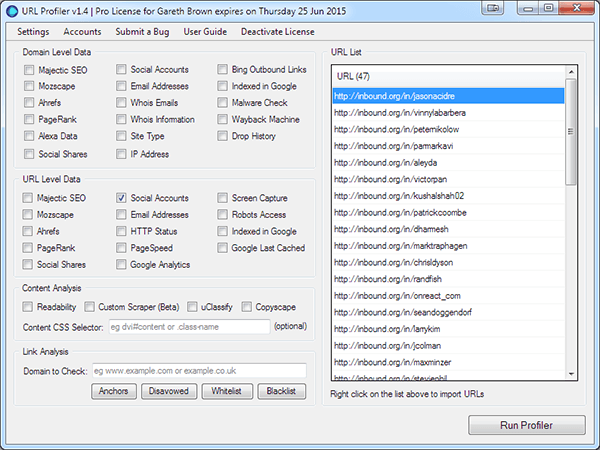
2. To retrieve social network links select Social Accounts within URL Level Data
3. Let’s configure the scraper
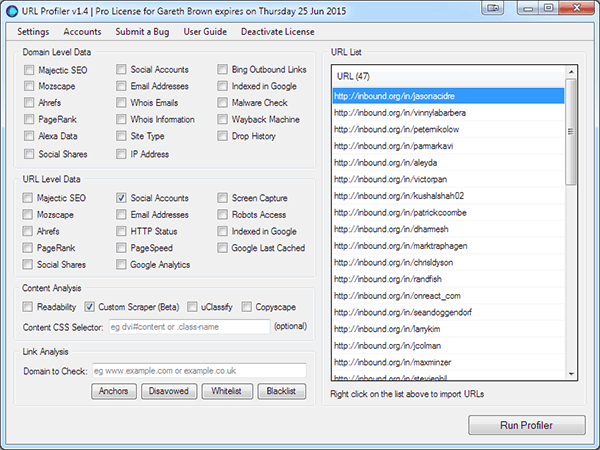
Select the Scrape Data option in the Content Analysis section. This will open the Custom Scraper settings panel, where you will enter the selectors for each piece of data to collect.
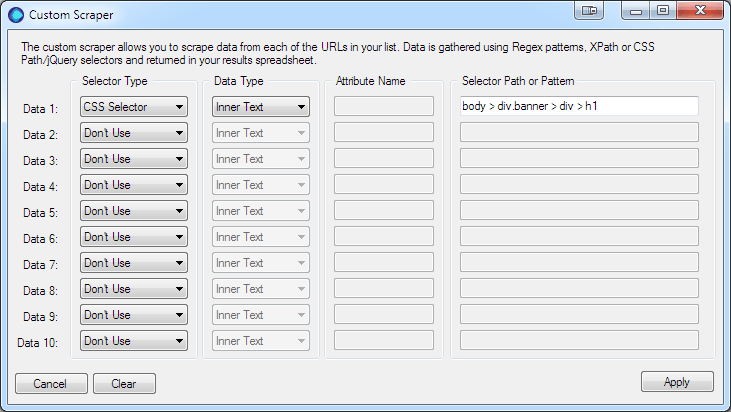
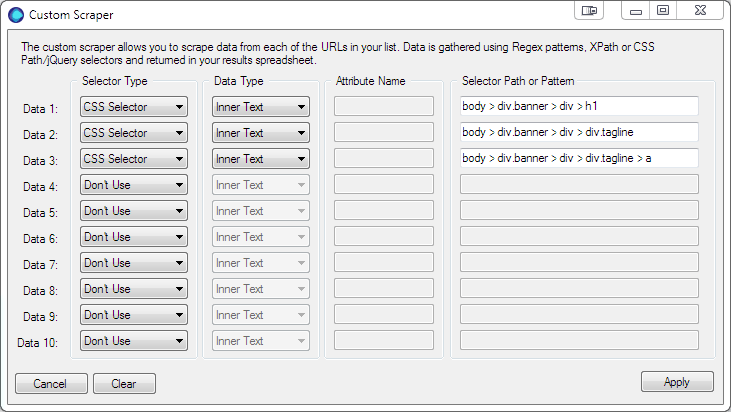
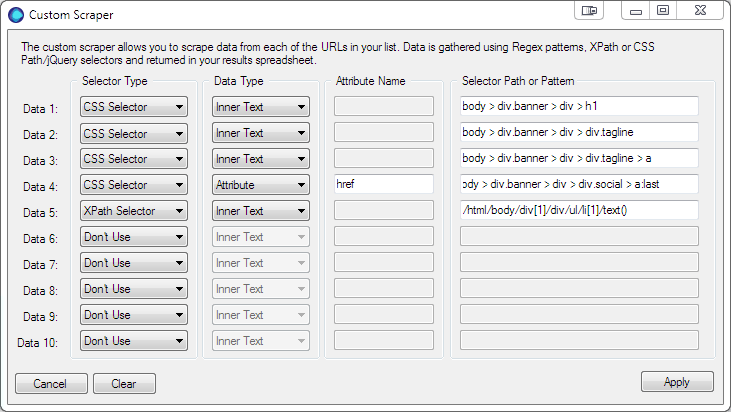
Data 1 the User’s Name – Choose CSS Selector for the Selector Type and Inner Text for the Data Type (the Attribute field will be disabled and as it’s not used). 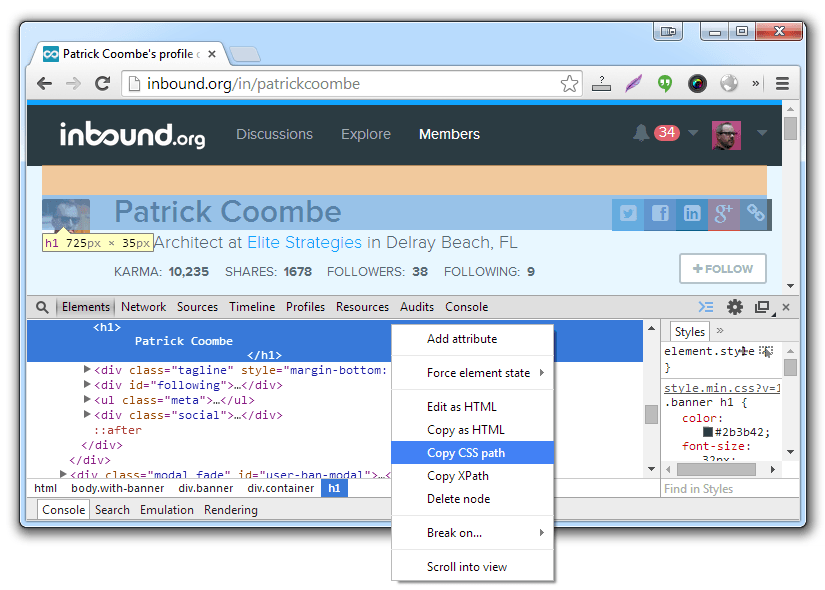 Selecting the element’s CSS Path using Google Chrome. You will use this same procedure for each of the data items.
- Now Open Google Chrome and navigate to one of the user profiles
- Right click on the text you want to scrape, in this case the Patrick Coombe header, and then click Inspect element, which open the Developer tools panel.
- Right click on the highlighted element
- Select Copy CSS Path
- Move back to URL Profiler and paste the path into the Selector Path field
body > div.banner > div > h1
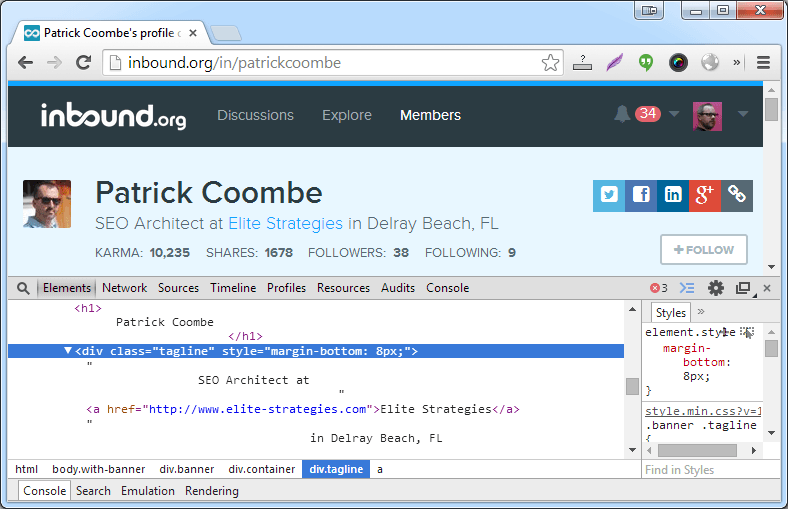
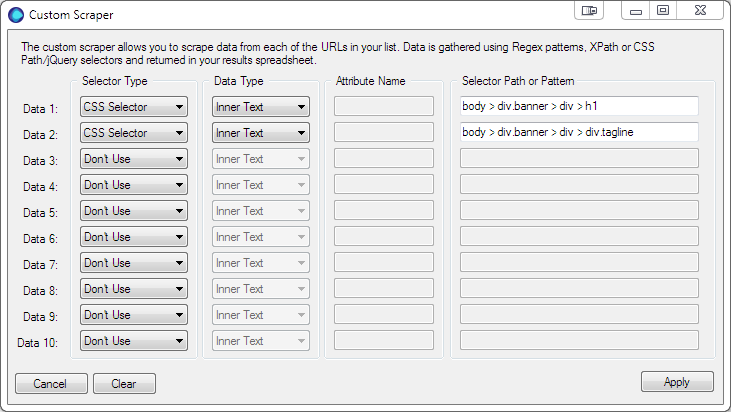
Data 2 the Job Title – selecting the job title element’s CSS Path using Google Chrome using the same procedure as above.
body > div.banner > div > div.tagline
Data 3 company name – again we’re going to use the CSS Path.
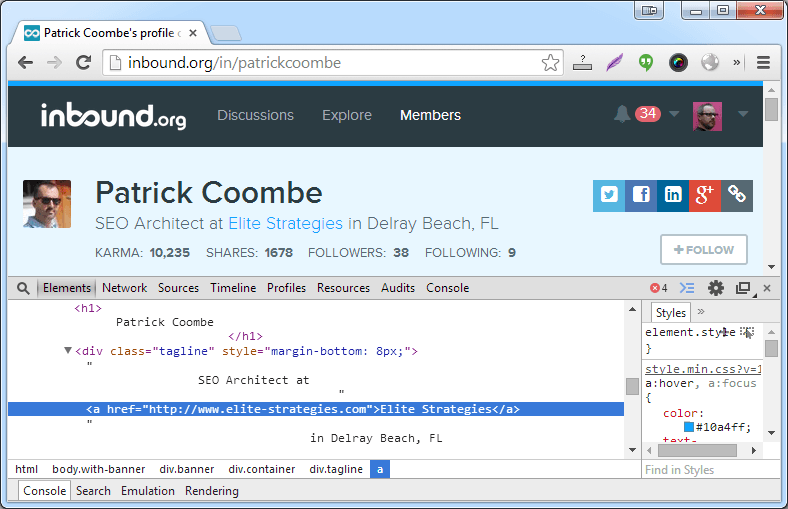
body > div.banner > div > div.tagline > a
Data 4 website URL – copy CSS Path, but this time to get the URL we’re going to get the HREF attribute.
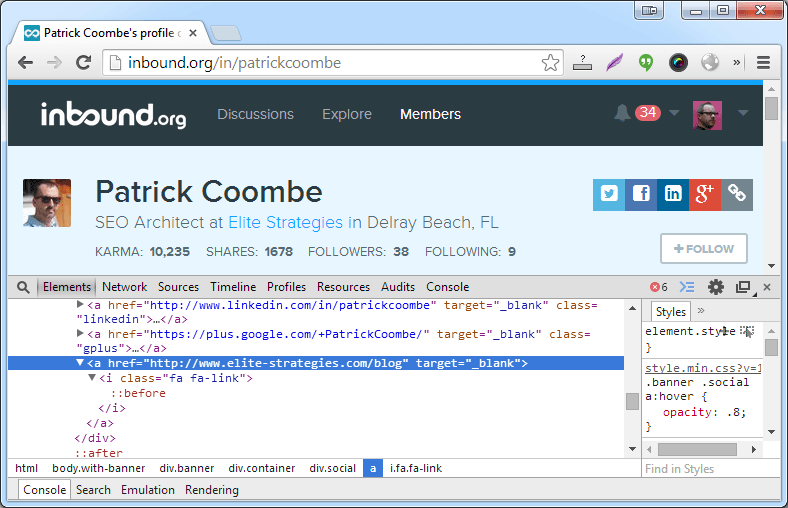
body > div.banner > div > div.social > a:last
Data 5 Karma – we’re now going to switch to XPath. You will notice the parent tag contains a span contain the word Karma. All we want is the number, so an XPath selector is the best choice.
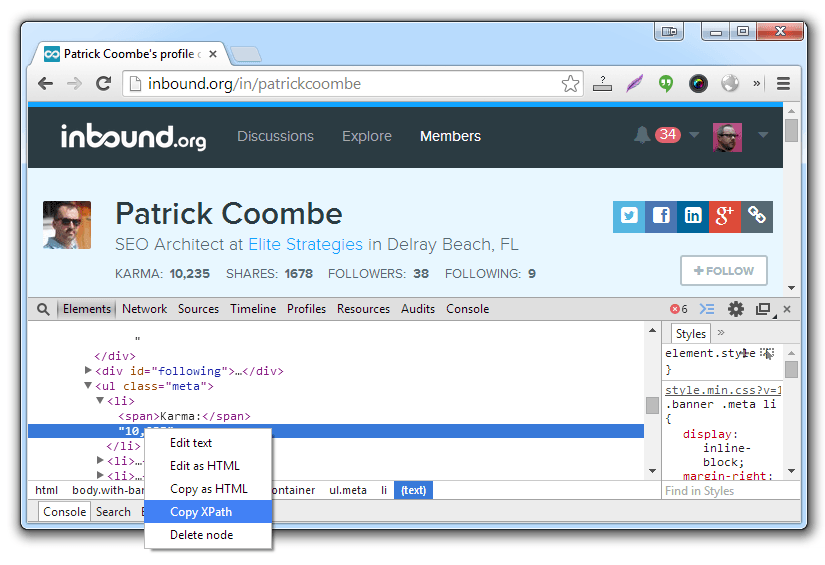
/html/body/div[1]/div/ul/li[1]/text()
Data 6 Shares, Data 7 Followers and Data 8 Following – Use Copy XPath to get the rest of the counts.
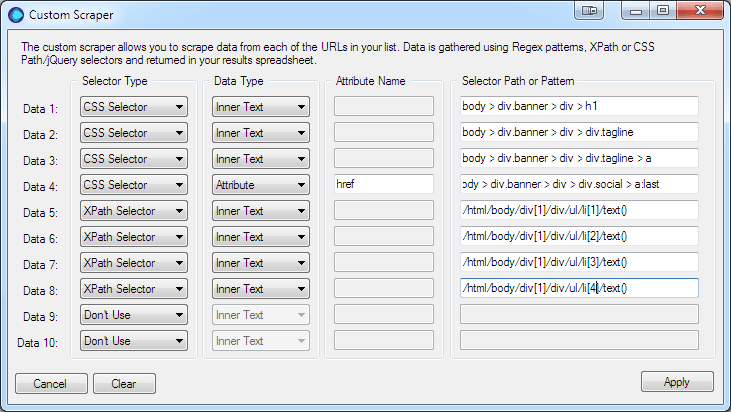
That’s it, click the apply button and run the profiler. And…if you’re interested here’s the results.
