How To Use The Google Indexation Checker

Note: This post has been updated in 2019 as we needed to make significant changes to how this function works, in order to combat changes from Google.
This is a step-by-step guide on how to use the Google Indexation Checker feature in URL Profiler.
How To Set Up Indexation Checks
The most common use-case for this feature is to profile all the URLs on a single site, as part of a technical site audit.
So you might have crawled the site with Sitebulb, and you want to verify that a particular set of URLs are indexed. Remember that just because a URL is indexable, this does not necessarily mean that Google will have indexed it. Similarly, you might want to verify that a set of URLs are NOT indexed (e.g. some old 404s or redirects).
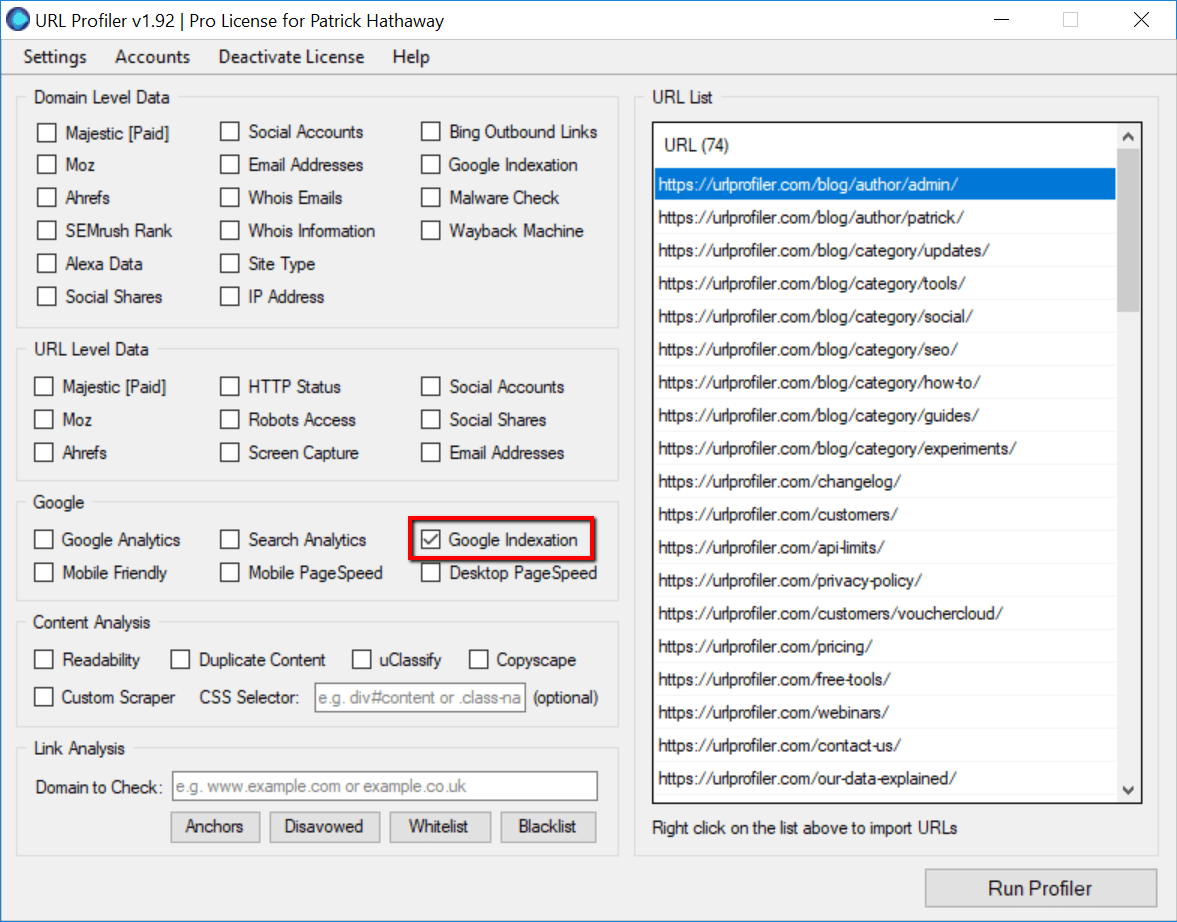
In this example, we’ll just import our sitemap and use that as the source of URLs. Then select ‘Google Indexation’ under the ‘Google’ option.
Adding Proxies
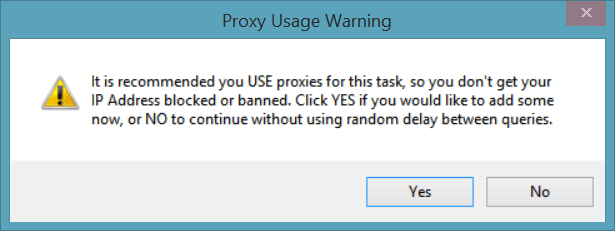
If you’ve not added proxies to URL Profiler before, the first time you select this option you will be shown a warning:
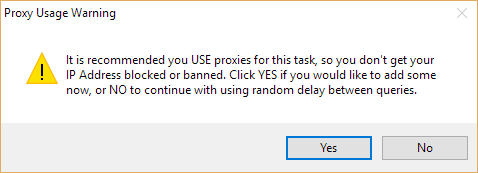
If you choose ‘No’, you can get away with it for smaller runs, but it will take a lot longer. Anything over about 100 URLs is likely to get your IP banned by Google.
Proxies are required because this feature automatically queries Google in bulk – and Google DO NOT like you doing this! (there is no other way to check URL level indexation)
Recommended Proxies
We recommend a provider called BuyProxies.org, and we suggest you use their Dedicated Proxies.
I have written a full, detailed guide which explains exactly how to use proxies with URL Profiler and how to get set up with BuyProxies.org.
Once you have your URLs in, and some proxies loaded, you are ready to go! Just hit ‘Run Profiler’ and wait for the program to complete.
Interpreting The Results
Since we made our changes, the results are extremely easy to intepret, essentially, you are looking for the ‘Yes/No’ in this column:
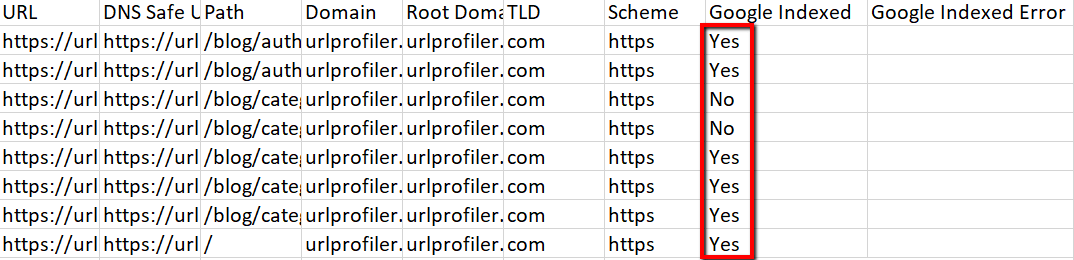
If the result is ‘Yes’, then this means that the URL is in Google’s index.
If the results is ‘No’, then this means that the URL is not in Google’s index.
It’s that simple. Mostly.
Instances where ‘No’ does really mean ‘No’
URL Profiler assumes very little in terms of the data you input, and doesn’t change the URLs you enter. For example, if you enter a URL without the trailing slash, it does not assume you meant to add a trailing slash.
This means that you will find examples where URL Profiler says a URL is not indexed, but you think it is – and the difference will be the trailing slash.
The main examples you will encounter:
- Trailing slash vs no trailing slash
- HTTP vs HTTPS
- www vs non-www
You can easily test this out on an URL you know is indexed, by just adding in a bunch of variations:

Note that this is the case even if you have redirects in place – URL Profiler does not assume that you wanted to follow the redirect and actually check that URL instead.
The reason for this is because there are so many different things you can use URL Profiler for, so we don’t try to guess what you really meant to do. For example, let’s say you have recently done a HTTP -> HTTPS migration, and want to double check if any of the old HTTP URLs are still indexed – URL Profiler will allow you to do exactly that, by loading in list of HTTP URLs.
What to do if you get ‘Blocked Connection’
If you use the Indexation Checker with proxies, you will almost definitely encounter the ‘Blocked Connection’ problem, where you are unable to get complete results because Google have blocked some of your proxies. Again, please read the using proxies guide to understand why ‘Blocked Connection’ happens in the first place. Here I will explain how to handle it in a practical situation.
So you might end up with a result that looks like this:
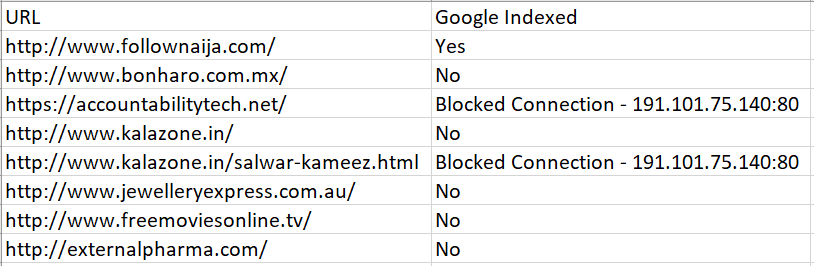
Here, we two URLs affected, and we have one proxy which has caused both issues.
So, the solution is straightforward:
- Copy the two affected URLs and put them back into the URL List in URL Profiler (delete all the others)
- Go to your proxy list in the URL Profiler settings, and delete the offending proxy (in this case: 191.101.75.104:80)
- Re-run the profiler, and once it has done, paste the results back into your original sheet
This will allow you to complete the task.
Depending on the number of URLs you are profiling, along with the quality and quantity of your proxies, you may need to perform this process across several iterations to fully complete the task.
The Most Important KPI for SEO
The reasons for checking index status are simple – if your pages are not indexed they can not generate organic search traffic.
Often, you’ll be looking for the inverse – you will have pages you don’t want indexed and you’ll want to make sure that they’re not.
Either way, thoroughly checking indexation can be one of the most important stages in a technical site audit.
URL Profiler’s index checker will allow you to do this more accurately and more thoroughly than any other SEO tool on the market.