How to Create and Submit a Disavow File

A disavow file allows a website owner to communicate with Google to tell them which of their incoming backlinks they don’t wish to be counted.
It is effectively a message to Google to say ‘please ignore these links’.
Before you get to the stage of creating a disavow file, you will first need to classify all your unnatural links, but for the purpose of this post we’ll assume you have done this already.
This post will cover all the steps necessary to creating a disavow file and uploading it to Google.
You’ll need to fire up Excel before you get going. Most guides you will read on creating a disavow file don’t mention Excel, but I don’t know why not – it allows you to get your formatting in order much more quickly.
Step 1. URLs & Domains
Before you start building your disavow file, you will need to make a decision about each link, whether you want to disavow it at the URL level or at the domain level.
- Disavow URL – this means Google will ignore any backlinks to you from a specific URL, such as anyolddomain.com/list-of-seo-links
- Disavow Domain – this means Google will ignore any backlinks to you from any URL on the whole domain, such as shadyseodomain.com
In my experience, I have never felt it necessary to disavow on the URL level. The reason for this is that sites which have allowed spammy links to be inserted in the first place are unlikely to be sites which you would ever want a link from in the future.
Either way, make a decision about each URL, either disavow on URL or domain level. For any URLs you wish to disavow, just arrange them in a single column in a spreadsheet:
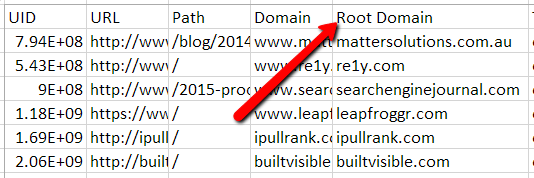
If you want to disavow links at the domain level, you will need to grab the root domain for each URL. If you have audited your links using URL Profiler, the root domain will already be in your export file.
So just grab everything from the 5th column of data.
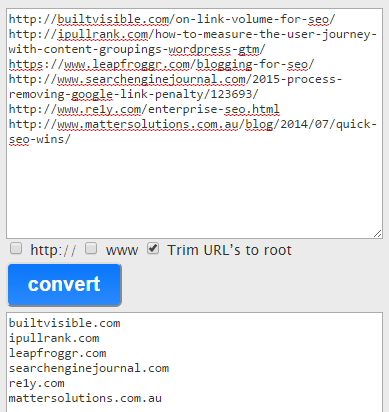
If you didn’t use URL Profiler to classify your links, then you can use a free tool like this one to trim your URLs to their root domain.
Whichever method you use, grab all the root domains and paste them into a new worksheet on Excel. Then we’ll just need to format them correctly for the disavow file; each line needs to look like this:
domain:example.com
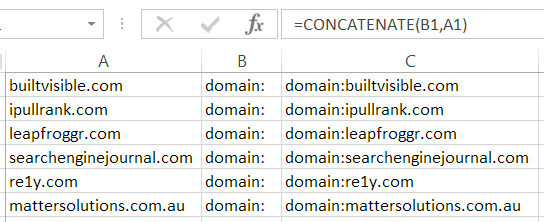
You can do this quickly and easily in Excel using CONCATENATE. If your domains are listed in column A, then just add ‘domain:’ alongside in cell B1, and fill down.
Then, in cell C1, simply add the formula: =CONCATENATE(B1,A1), and fill down.
Step 2: Creating a Notepad File
You are almost done with Excel. Finally, grab everything in column C and copy/paste underneath your original list of URLs.
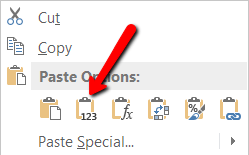
Note that when you paste you will need to paste values (Paste Special -> Paste Values) to avoid dragging the formula across.
If you have thousands and thousands of domains on your disavow, it makes sense to remove duplicates before proceeding.
Make sure to save your final deduped Excel file. If you ever need to update it in future, it is much easier to do in Excel than in a notepad file.
Open Notepad (or TextEdit on Mac), and paste in all your data from your Excel disavow list.
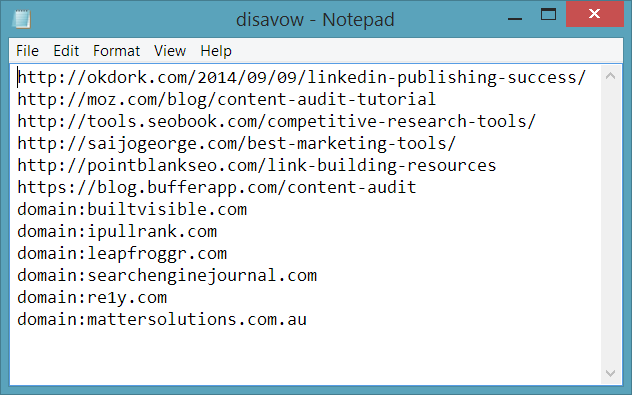 If you are disavowing URLs and domains, the notepad document will look like this one. Obviously, if you are just disavowing domains, there will just be a long line of domains.
Step 3: Adding Comments
If you wish to add comments to your disavow file, add a line at the top which begins with a hash, for example:
#Disavow list updated May 30th 2015, including 205 new domains
Some people think it is beneficial to leave notes in here which Google may read (like ‘#We are very sorry Google etc…’). Don’t bother – the list is machine processed, humans never look at it, so you are just wasting your time.
I tend to use comments only to make notes to myself for future updates.
Step 4: Uploading Your Disavow File
Google make it intentionally difficult to upload a disavow file, mainly to stop unknowing webmasters from accidentally disavowing all their links.
Here’s what you need to do:
- You must be logged into your Google account, and you must be a verified owner of the domain
- You have to click on this link (you can’t access it directly from GWT)
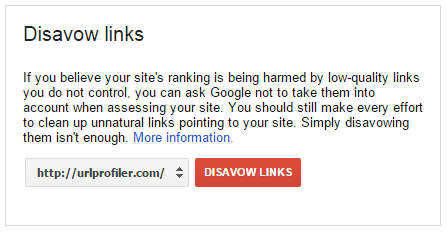
Here’s where you’ll end up.
Make sure the correct domain is selected from the dropdown, then hit the red button ‘DISAVOW LINKS’. You’ll come to yet another warning screen with a big yellow box of text.
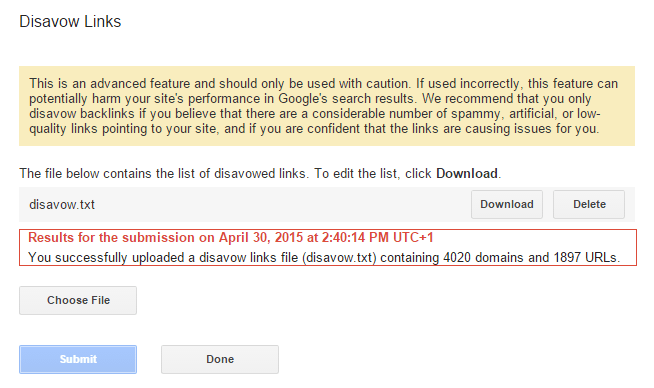
Click the button which says ‘Disavow Links’. In the resultant popup box, click ‘Choose File’ then find your disavow text file to upload. Hit ‘Submit’.
Once this is done you will see a screen like this:
You’re all done! Click the ‘Done’ button and move on with your life.
You’ll get a message in Google Webmaster Tools confirming the upload, then you’ll need to wait a few weeks before Google recrawls the links to see changes (if any).
Invisible Step 2.5 – Double Check
I didn’t include this in the original 4 step process above as I didn’t want to overcomplicate matters.
However, having seen many badly put together disavow files it is definitely worth mentioning that you might want to check your domains before you upload them.
Google can and will ignore links even if they are from really great, trusted domains.
See this Search Engine Land post from Glenn Gabe which outlines several processes for checking your domains (including one using URL Profiler!).


